HTTP error with the Powershell SDK – Quickpost
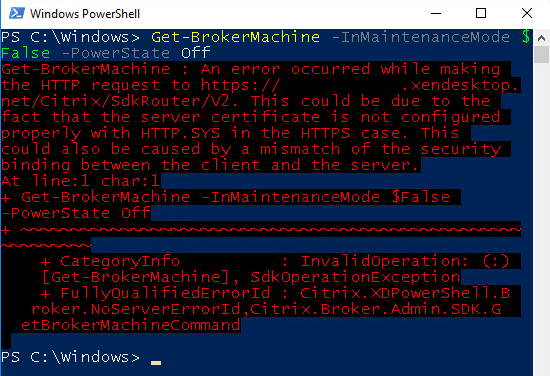
This week we were having issues while connecting to Citrix Cloud using the Powershell SDK (more info) for Citrix Virtual Apps and Desktops services; we received the following error: An error occurred while making the HTTP request to https://<customerID>.xendesktop.net/Citrix/SdkRouter/V2. This could be due to the fact that the server certificate is